

Open in VSCodium
A Finder toolbar button to open files or folders in VSCodium
I recently switched from Visual Studio Code (on Mac) to VSCodium and missed Sertaç Özercan’s OpenInCode toolbar app. With that tool you can select a file or folder and click on the toolbar icon to open the selection in Visual Studio Code.
This post describes what I did to “restore” the toolbar button functionality for VSCodium.
To restore this missing functionality I had several options:
- Fork the “OpenInCode” repo.
- Use Applescript to create a toolbar app
- Use Automator to create a toolbar app.
The first option I considered just briefly, it felt to much for such a “simple” task. For the second option I found a script, tried it but it was “sluggish”. Like a two-step approach. Therefore I chose the Automator option.
In the steps below I explain how to to build it in Automator but you can also go straight to the end, download the “app” and install it in your toolbar. The Automator steps can also be used to create other toolbar shortcuts.
Automator

Open the Automator on your Mac and choose “Application” as document type.
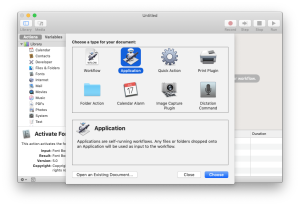
The empty Automator screen …
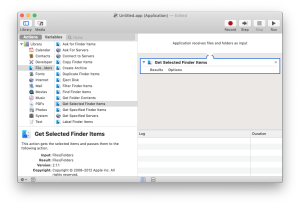
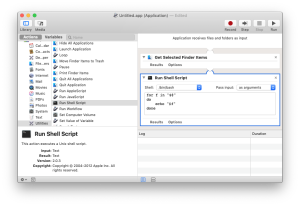
Select “Get Selected Finder Items” from “Files and Folders” in the Library, and drag it to the panel on the right side.
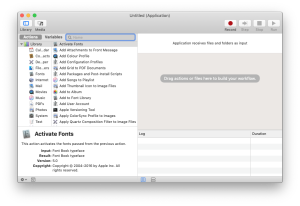
Select “Run Shell Script” from “Utillities” in the Library, and drag it to the panel on the right side.

In the “Run Shell Script” panel on the right side change the “Pass input:” parameter to “as arguments”. Some sample code will appear in the input panel.
If there is any sample code in the input panel, select it and delete it. Make sure that the “Shell:“-parameter states /bin/bash.
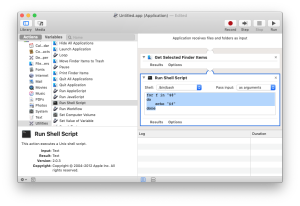
Paste the following line in the input panel of “Run Shell Script”:
open -n -b "com.visualstudio.code.oss" --args "$*"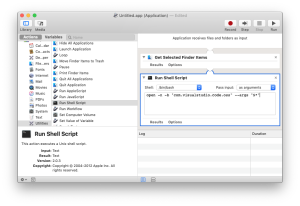
That’s it for the Automator configuration part. Now save the application.

Customize the icon
From a functional point of view the app is ready, what’s left is to customize the icon. For that I created an icon set based on an earlier version of the now blue icon.

There are two ways to add it to the app:
- “Get info” on the app and drag or copy the icon file on top of the small icon in the top left corner.
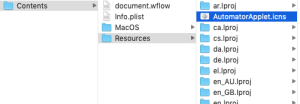
- Open the app package “Show Package Contents”, go to Content/Resources and replace the AutomatorApplet.icns with the icon file.
I chose the second option because the new icon becomes part of the application bundle. Right click on the just created app file and select “Show Package Contents”.
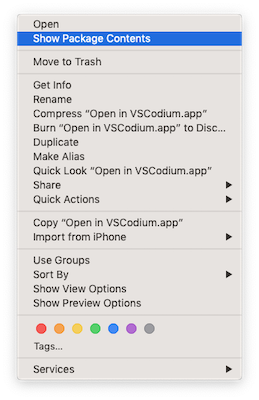
Open the “contents/Resources” folder and replace the AutomatorApplet.icns with the “VSCodium”-icon file. For convenience the icon-file is already named that way.
Add the app to the Finder Toolbar
- Download the app(let) and unzip it.
- Move the "Open in VSCodium” app to the Applications folder.
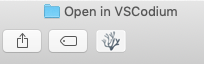
- From the Applications folder, drag the “Open in VSCodium” app to the Finder toolbar while holding the command-key (⌘).
It should look like the image below.
Now you can try it out, select a folder or file and click on the new button to open VSCodium with the selected items(s).
Comments